Building a Raised Garden Bed
Are you considering building your own raised garden bed? Consider some of the advantages to raised bed gardening:
- No soil compaction due to the fact that walking between the aisles is eliminated, as done in a traditional garden. Consequently, the overall plant’s root health and water drainage and oxygen flow will increase. This can result in larger, healthier plants.
- The reduction of back strain.
- It is said to extend the growing season because your soil will warm up sooner.
- More plants can be grown in a smaller area because there won’t be a need for a walk path between the plants.
- Controlled soil quality
- Better weed control
Consider some of the disadvantages to raised bed gardening:
- Time and cost to make your own.
- You will need access to proper tools to build
- Watering needs will likely increase
Some important ideas to keep in mind:
- You should make the bed only as wide as you can comfortably reach to the center. A good width is between 3-5 feet.
- Your depth will also depend on the plants you decide to harvest. Deep-rooted plants, such as carrots and radishes, will need a minimum of 8 inches. While other plants, such as tomatoes and squash, have been grown in 6 inches of soil. Obviously, the deeper your roots are allowed to grow will result in a healthier crop.
Select your location
Your sun requirements will depend on the plants you choose, but most garden vegetables require an average of 8 hours of sunlight. Also make sure you are close to a water source. Being on level, well-drained ground is important as well.
If building multiple raised beds, be sure to leave at least 3 feet between the beds to allow for mowing and walking.
Select your material
There are many different materials that can be used to build a raised garden bed. This will depend on your specific desires and materials you might have on hand. You should research several plans and see which fits your needs best.
Here are a few materials that work well:
- Concrete blocks, stones or patio edgers- This can become a more permanent garden fixture by applying mortar between the stones of your choice. Build them up to the desired height.
- Wood- It is important to use a rot-resistant wood, such as cedar or redwood. It is not recommended to use pressure treated woods as the chemicals currently used to treat the wood contain Alkaline Copper Quaternary (ACQ) or Ammoniacal Copper Citrate (CC) and Copper Azole (CBA), to name a few. Older treated wood that was used residentially contained Chromated Copper Arsenate (CCA) and was widely scrutinized for its use of the known carcinogen, arsenic. You wouldn’t want these chemicals leaching into your plant’s water source.
Build Your Raised Garden Bed
While there are many sizes and designs for garden beds, the detailed instructions below are how my husband and I built our 1’x4’x8’ raised garden bed using cedar. Look at many plans and determine which best fits your needs.
Materials:
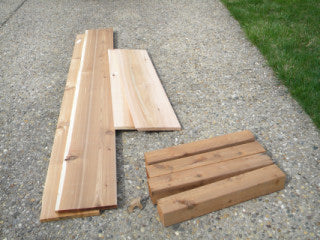
- (3)---1”x12”x 8’ cedar boards with 1 of these boards being cut in half to give you
- (2)-4 foot long pieces (as shown in the picture)
- (1)---4”x4”x 8’cedar post with this post cut in 4 equal pieces of 2 feet each (Most hardware stores will cut these pieces for you at minimal cost)
- 24 galvanized wood screws
- Drill and a drill bit (making sure the drill diameter is smaller than the screw size) to pre-drill the holes to avoid any cracking of the wood.
- C-clamps to hold post and board together while drilling and screwing
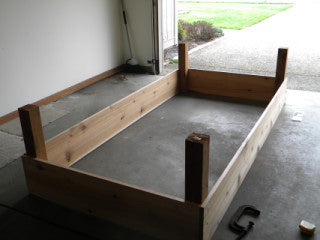
Our raised garden bed was built on the garage floor, inverted. In other words, the top facing boards were laid onto the garage floor and posts that are sticking up will be buried in the ground. The garage floor gave us a level surface from which to build. Start with one post and one board. We started with one of the 8 foot boards and one of the posts.
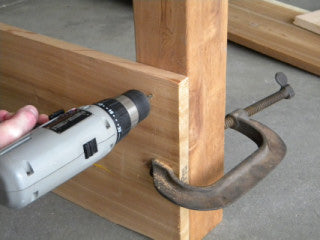
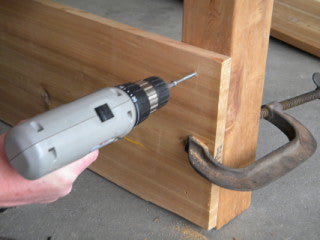
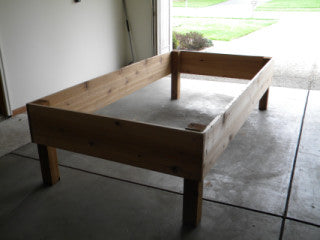
Attach the c-clamp, assuring that the edges of both board and post are flush with one another. Pre-drill and screw the two boards together using 3 screws for each side. Your short-sided board (4' board) will be placed flush with the outside of the previous long-sided piece you just attached. Continue this sequence through until completion. (See completed unit below, first image is inverted and second image is how it will be placed into the ground.)
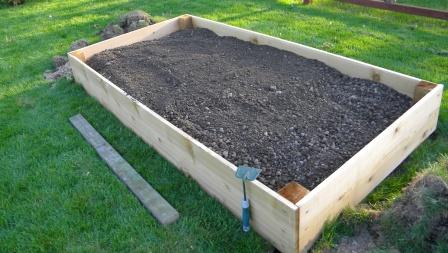
Prepare your site
Remove the sod from your future garden by digging down just below the roots and remove. If you have clay soil, it’s wise to dig down at least 6 -12 inches to loosen up the soil. This allows for better drainage. Some people have had great success with lining the bottom and sides with a barrier of wet newspaper over the area to prevent weeds from growing.
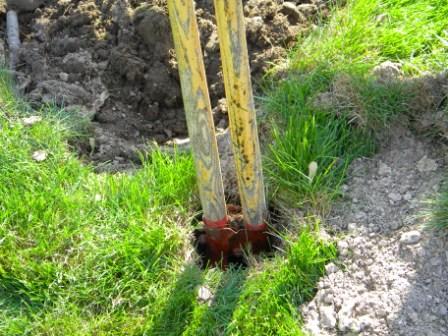
Using a post hole digger, dig a hole for each of the posts. You can estimate your hole location by placing your assembled garden bed in it's future location and outline the post holes with string or spray paint. I actually left my bed sitting on top of the grass long enough that the grass died under each post, so I knew exactly where to dig! Dig deep enough to bury the posts completely.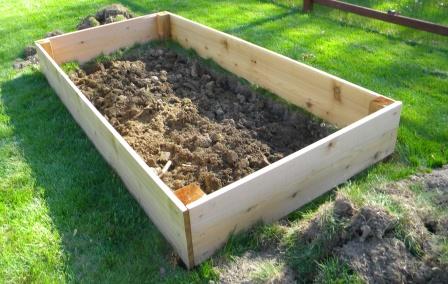
Carry the raised bed out to your desired location. Place posts into the post holes that you dug. Fill your bed with a mixture of compost and soil to about 1 inch of the top.