

It was love at first sight when I first saw this plant. Living in Indiana, I love to have that tropical feel in my backyard during the summer. I bought this plant online and planted it in a pot after the threat of frost was past. It was a beautiful addition to my patio.
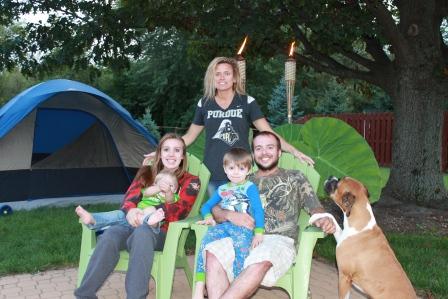
Keep in mind that in its native habitat, it reaches heights of 9 feet or more. My plant, however, only reached a height of maybe 3 feet. The leaves were truly gorgeous though. You can see plant in the above picture, which is directly behind the standing woman (me!). I’m confident that with a longer growing season plus more fertilizer would have made this plant grow exponentially more than it did. I will be experimenting with that next summer.
Overwintering
With its native habitat being Thailand, it prefers zones 8-11. This is important information when considering your overwintering needs. After some research, I learned that not all species of the Colocasia genus are quick to grow corms. And this happens to be one of those. For my growing zone, this particular plant should be brought indoors during the winter and placed in a cool location (45-60°F) with bright light, being careful not to overwater as this plant will be semi-dormant. I have chosen to overwinter this plant in my garage under a grow light.
Harvesting the Seed
As Autumn approached, the plant produced several inflorescences, I wanted to try my hand at propagating it. Inflorescences are essentially the complete flower head, shown in the picture below, consisting of the spathe and the spadix. The spathe is the white thin bract that surrounds and protects the spadix. While the spadix is the spiked center portion, which contains the male and female portion.
Pollination occurs when the male portion of the spadix produces a powdery-like build-up of pollen. In nature, the pollen can be transported with the help of insects. Hand pollination can be achieved too, especially if your plant is contained indoors.
Individual seed pods are located towards the bottom of the spadix, which is the female portion (see picture).  Each seed pod will be about the size of a pea when ready for harvest and the individual pods are full of seed. An entire seed head may have up to 100 or so individual seed pods. So, there is a potential for thousands of seeds!
 Seeds shown settling to the bottom of the bag
When is the seed ready?
You will want to wait until the white portion of spathe actually falls from the plant. The seed will develop in the lower (female) portion of the flower. After 3-4 weeks, cut the flower completely off at the base of the female portion. You can then peel that surrounding green portion that is around the female part and you should see the swollen seed pods containing seed. Take the entire seed pod, soak it in a Ziploc-style baggy with 1/3 water and all the air pressed out. Let the seed pod soak for a couple of hours to soften. Once soft, massage the entire seed head and you should be able to see the tiny seed. Try to get the seed to sink to the bottom of the bag (see image below).
An Alternate Method
Now I’ve also read where if the spadix is left alone, the female portion of the spadix will eventually rupture open full of seed. From there, the seeds can be extracted. I have yet to try this technique. However, I have successfully extracted seeds with the prior technique. I then dried the seeds and will propagate in the Spring.
Anyone have any thoughts or experience to share? Please feel free to share your knowledge.