Tools and Materials
4” diameter corrugated perforated pipe cut to 8’ lengths, lined in fabric
1-1/8" I.D. or larger PVC water fill tube
½” vinyl pipe for drainage
Pond Liner
Staple Gun

- Tools and Materials
A few years back, I wrote an article on building your own raised garden bed, which can be read here. And while I have enjoyed the raised garden bed, I wanted to improve on that one step more. So I decided this year to turn that existing raised garden bed into a sub-irrigated planter (SIP).
The idea of a SIP is that it has a self-watering reservoir at the base of the raised garden bed allowing for minimal watering. The water that is contained in the reservoir is wicked through to the plant’s roots via several rows of fabric-lined perforated corrugated drain pipe that lay in the reservoir. At one end of the SIP, a PVC fill tube allows for filling the reservoir. While the other end contains a drain tube, to ultimately control the water level contained in the reservoir.
A SIP offers huge benefits such as: the plants roots stay consistently moist, there’s less evaporation and you won’t have to water as often. This means your summer vacation won’t result in neglected plants.
- Image 2 - Remove soil down to earth level
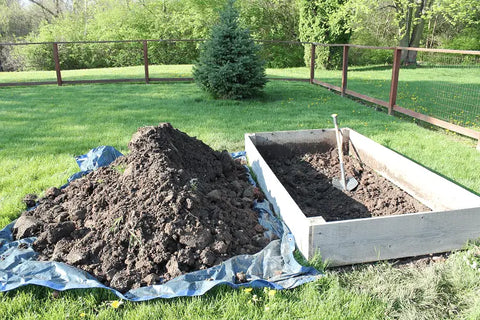
If you don’t have a raised garden bed already built, feel free to follow those instructions that are contained in the link above. Since my raised bed has already been established, I started by removing the soil down to earth level (Image 2). At that point, make sure your soil is level from all ends and sides. If left unlevel, there will be an uneven distribution of the water in the basin. Consequently, all plants may not receive adequate water.
Unfold and evenly place your liner inside the raised bed. You might find you’ll have to creatively tuck in your corners. From there, begin stapling the pond liner to the inside of the raised bed (Image 3). Trim excess pond liner if needed. I trimmed my excess pond liner so that it was level with the top of the garden bed.
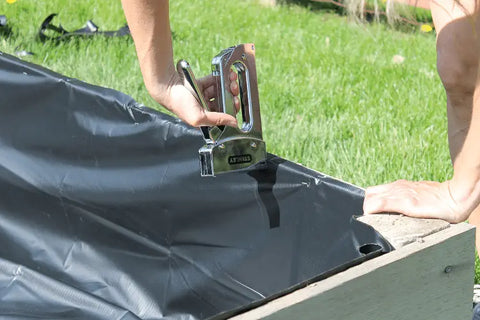
- Image 3 - Staple pond liner to the inside of the raised bed
Next, cut your corrugated pipe to fit so that the ends are wedged tightly against the short side of the walls. Additionally, I wrapped my corrugated pipe in cotton fabric (Image 4). I have heard conflicting instructions on this step. I’ve read where individuals chose not to wrap their pipe in fabric and had success. I decided on wrapping it to help eliminate dirt entering the pipe through the perforated openings. Do you own research and try what you think is best. Pack dirt around the pipe to keep the pipe aligned. At this point, don't fill all the dirt in yet as you will need access to the top of the corrugated pipe.
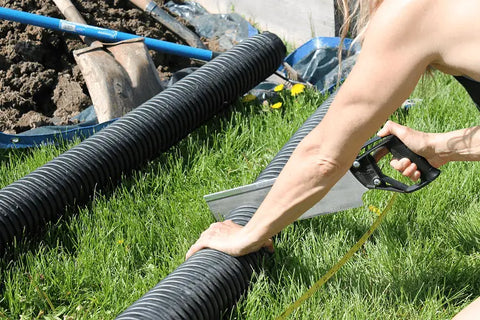
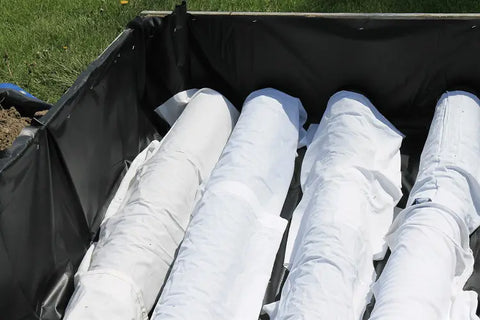
- Image 4 - Wedge the fabric-wrapped corrugated tubing against the short sides of the garden bed walls
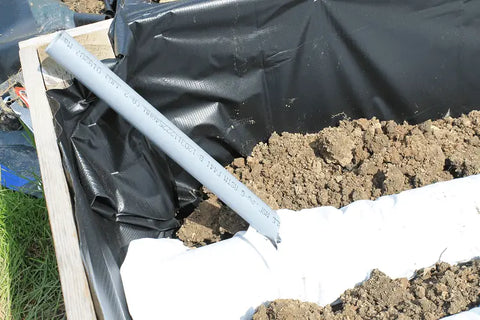
- Image 5 - Place water-fill tube into the corrugated tubing
Measure and cut a hole on the top side of the corrugated pipe for the water fill pipe (Image 5). I used a 1” PVC pipe and chose the end on the corrugated pipe most convenient for watering purposes (nearest my water source). The water will flow through this pipe, into the corrugated pipe and through the perforations in the pipe to the roots of the plants. UPDATE: After using this water fill pipe, I would recommend a large enough inside diameter (I.D.) of PVC pipe greater than the outside diameter of your garden hose. For example, my garden hose outside diameter (O.D) is 1-1/8", so allow for a bigger water fill I.D. so that your hose easily slips down into this fill tube. Otherwise, the end of your garden hose will just butt up against the end of the water fill tube and you'll have to hold the hose while filling. If you're like me, less work is better!
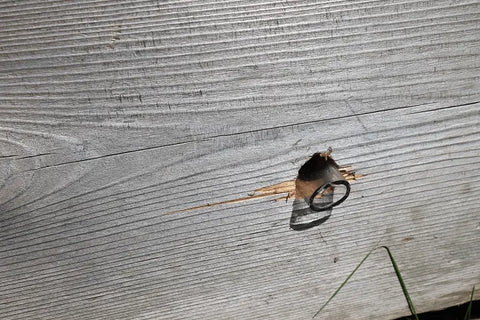
Next, drill a drain hole through the wood on the raised bed on the opposite end of your fill tube just above the height of the corrugated pipe. Cut or drill a hole through the top of the corrugated pipe to accommodate your vinyl tubing. Run the vinyl tubing from the corrugated pipe to the outside of the raised bed (Image 6). This drain hole will automatically prevent your water level from exceeding this point.
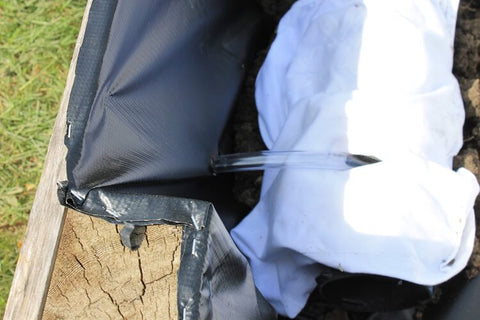
- Image 6 - Vinyl tubing (drainage) running from top of corrugated pipe to the outside of the raised bed.
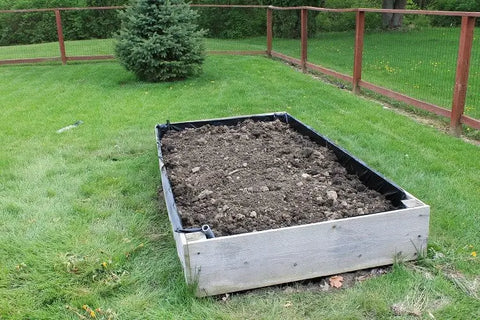
Next, fill in your raised bed with dirt, being careful to keep dirt from entering your water fill hole (Image 7).
This is also a great opportunity to amend your soil. I added several 40 pound bags of composed manure for extra nutrients.
What's next? The fun part! Add plants and water and enjoy your new low-maintenance SIP raised garden bed.
- Image 7 - Fill in soil
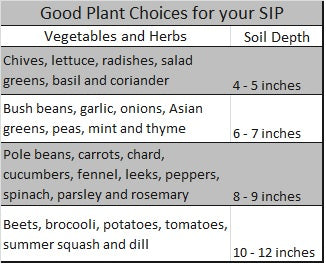
Many vegetables and herbs are ideal for your SIP. Many require different levels of soil depth so keep that in mind when planning your garden. The chart located in Image 8 is a good rule-of-thumb to help you get started. Happy Gardening!
- Image 8